How to Properly Cut a Tree Branch
- Gardening Expert and Host of Growing a Greener World®September 7, 2024
Selectively removing tree branches can significantly improve the look and health of your trees, and overall landscape. When done properly, making the appropriate cuts allows more sunlight to reach your understory layers, including plants, groundcover, and lawn. It can also create a more balanced, aesthetically pleasing look. However, it's crucial to prune correctly to ensure your trees recover quickly and avoid potential negative consequences. Here’s a guide to help you make the proper pruning cut every time.
The Three-Step Cut
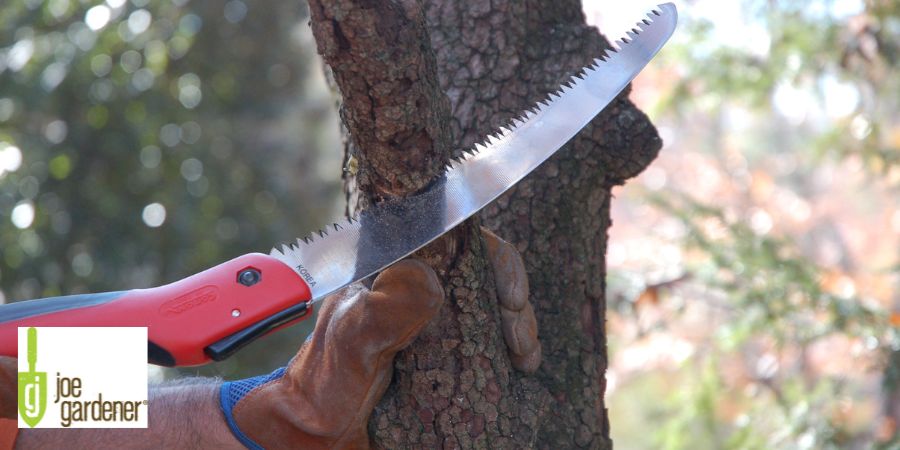
Step 1: Start With the Initial Undercut
Using a sharp, handheld pruning saw, begin by making the first cut about one to two feet out from the tree trunk. This cut is made from the underside of the limb, cutting up into the branch about one-third of the way through. This initial undercut is essential. It prevents the protective bark from tearing down beyond the undercut as the branch begins to fall away during the second cut. Bark torn away, exposes the vulnerable wood beneath to certain damaging insects and disease.
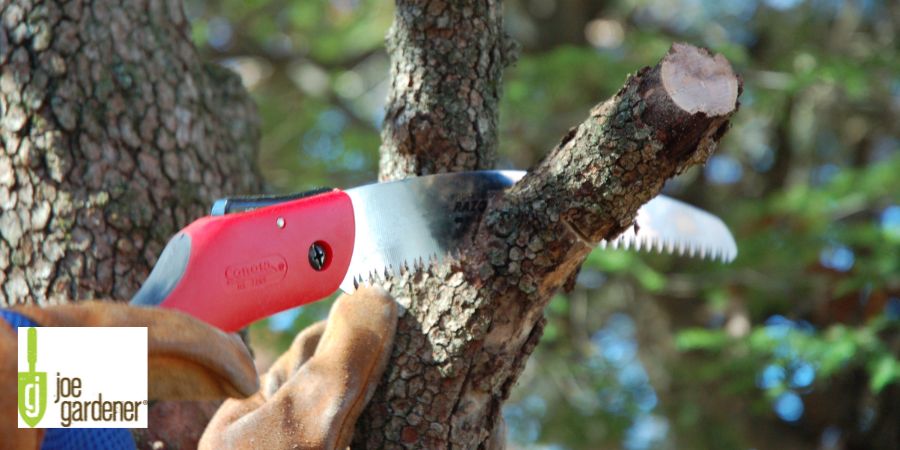
Step 2: Cut Through the Branch Beyond the Undercut
The second cut should be made another foot or more beyond the first cut. This cut should go all the way through the branch from the top down. As you progress through the branch, the weight of the limb will begin to cause the branch to fall away. The deeper into the cut you go, the more the branch drops. As you near completion of this cut, but before it’s finished, the branch often fully breaks away, pulling the protective bark with it.
But, because you've already made an undercut closer to the trunk, the undercut prevents the bark from continuing to tear towards and down the trunk when the branch breaks away. This is why the undercut is so important.
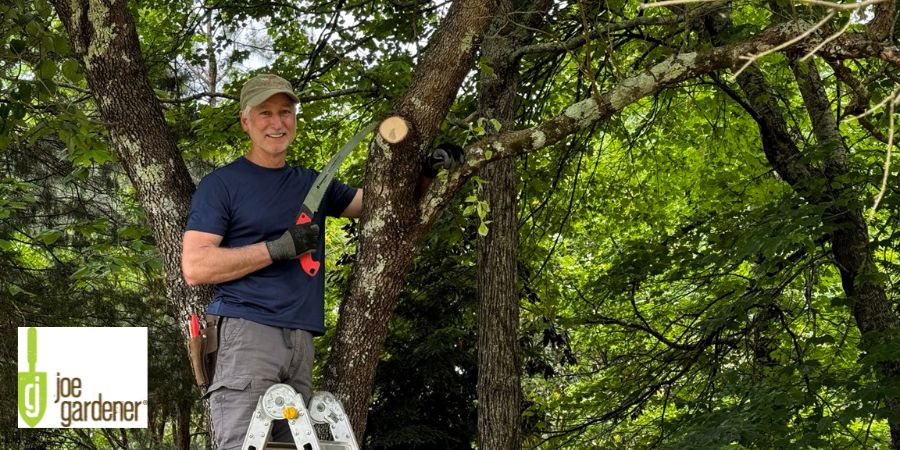
Step 3: Make the Final Cut at the Branch Collar
The final cut should be made right at the branch collar, very near where the branch meets the trunk, but not flush with the trunk. Look for the flared area here where the branch meets the trunk. It will be widest there, but quickly tapering down to the same width as the branch. Make the cut just far enough out to preserve the flair. It should still be evident after this final cut.
When done correctly, the remaining flare will seal itself, heal over, and eventually fill in with new bark or scar tissue. You'll know the tree is healing properly when you see a doughnut-shaped formation at the cut end of the flair.
Timing Your Pruning
The best time to remove tree limbs is during dormancy, typically in late winter. During this period, disease pathogens are less active, reducing the risk of infecting your trees by way of the exposed pruning wound. In contrast, a fresh cut or wound during warmer months is somewhat more likely to be an entry point for diseases and insects.
Handling Bleeding Trees
Some trees, such as beech, birch, elm, maple, and yellowwood, tend to “bleed” excessively when cut. This bleeding is sap oozing from the fresh cut and, although unsightly, it causes no harm to the tree. In such cases, I prefer to time my limb cuts for after the sap has finished running.
Avoid Using Wound Dressings
You might be tempted to dress fresh cuts or wounds with tree paint or wound sealant marketed for this purpose. However, this is rarely, if ever necessary and can actually slow down the natural healing process and in some cases create new problems. Trees are adept at adapting to adverse conditions, so the best practice is to make a clean cut and leave it alone.
Following these guidelines will help you make the proper tree limb removal cuts while eliminating future problems. Taking shortcuts or pruning at the wrong time can lead to more issues later on. You can never undo a cut, so use the three step approach, and know you’ve made the right cut!