How to Select Plants For a Small Rain Garden
- horticulturist and gardening expertJune 29, 2024
No matter how small your yard, you can make a difference when it comes to managing storm water. Every action we take to help keep water on our landscapes can help reduce the risk of basement flooding, storm sewer overflows, and water pollution. Frequent heavy rainfalls make it more important than ever for us to help manage the water that falls on our property.
Rain gardens are a beautiful option for helping to manage storm water. These gardens not only capture and help remove pollutants from the rainfall as it moves to the groundwater, but they also support songbirds, pollinators and other beneficial insects.
If you are gardening on a small city lot, especially in older communities, your downspouts may be connected to a combined sewer system. These combined systems collect rainwater and melting snow that enters through the downspout and is combined with household wastewater. During heavy rains every downspout can send as much as 12 gallons of water a minute to the sewer system. This can overwhelm the sewer system and water treatment plants. Disconnecting your downspout and directing the water to a rain garden can make a difference.
Always start with a call to your municipality to make sure disconnection is an option. You’ll also need to confirm you have sufficient space for the water to drain into the lawn and gardens. You should be at least 5 feet from your property line and avoid directing water onto walks and drives where it can cause a hazard.
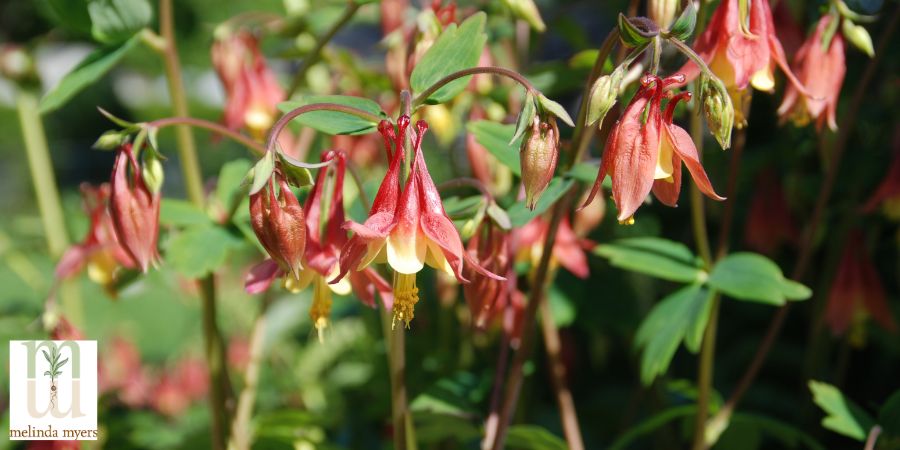
Wild Columbine Aquilegia canadensis
Selecting the Location for Your Rain Garden
Now it’s time to locate and begin designing your rain garden. Start with a call to 811 at least 3 business days before you start digging. They will contact the utility companies who will come to your yard and locate any underground utilities in the work site. This is an important step to help reduce the risk of injury and inconvenience of inadvertently damaging a buried utility. It can also save you money as you are responsible for the repair costs if you do not contact them in advance.
Also, contact your local municipality and have them locate your underground sewer pipe lateral, which carries water from your home to the city’s sewer pipe in the street. You’ll want to stay as far away from this as possible. In small city lots this may only be a couple of feet.
I like to make these calls during the planning process. This allows me to avoid conflicts as I develop my plan as opposed to making major last minute adjustments during garden installation.
Once the downspout is disconnected and utilities are located, start the design process. Grab a rope or hose to help you visualize the shape, size, and placement of your new rain garden. Aim for at least a 15- to 25-square-foot bed, like one that is 5’ x 3’ or 5’ x 5’.
Marking the area for your rain garden
Keep the garden at least 6, preferably 10 feet from the foundation of your house and trees whose roots make it hard to dig. The ground should slope away from your home, helping direct the water away from the foundation and into the rain garden. A slope of one inch for every one foot that you move away from the house for the first 5 to 10 feet is preferred but not always possible. If the ground slopes towards your house, you will need to adjust the grade to help keep water out of the basement.
Once you decide on the size and location, it’s time to select the plants. You will need about 15 to 20 rain garden plants that will thrive in your climate and growing conditions, including the sunlight reaching this part of your landscape.
Avoid aggressive plants that can overtake the more timid neighboring plants and quickly fill the rain garden. Otherwise, you will either need to dig and divide the aggressive plants regularly to keep them inbounds or you’ll end up with a rain garden with just a couple of plants. This lack of diversity negatively impacts the garden’s seasonal beauty and the support it can provide for pollinators and songbirds.
A Few Plants for Small Rain Gardens
Prairie Phlox Phlox Pilosa is a native spring bloomer with pale pink to lavender flowers. You’ll enjoy the flowers as much as the hummingbirds, monarchs, and other butterflies that stop by for a visit. These plants grow 1 to 2’ tall, are hardy in zones 3 to 9, prefer full sun, and tolerate dry to moist soil.
Wild Columbine Aquilegia canadensis has uniquely shaped red and yellow flowers that attract a variety of pollinators. This early season bloomer is hardy in zones 3 to 8 and grows 1 to 3’ tall. This adaptable plant grows well in full sun or shade and tolerates a wide range of soil as long as it is well-drained. It does reseed readily so you will need to remove unwanted seedlings when doing your late spring cleanup.
Prairie Smoke Geum triflorum puts on a long-lasting late spring to early summer display with its nodding pink flowers and feathery seed heads. This low growing native plant tolerates dry soil and full sun making it an excellent choice for those drier edges of the rain garden. Also known as Old Man’s Whiskers and Purple Avens it is hardy in zones 3 to 6.
Butterfly Weed Asclepias tuberosa forms a low mound with bright orange flowers that make it a popular plant in gardens and landscapes. It prefers full sun and well-drained soil so plant it in the drier spots in the rain garden. Hardy in zones 3 to 10, it is a host for monarch and queen butterflies, and the flowers attract hummingbirds, butterflies, and other pollinators.
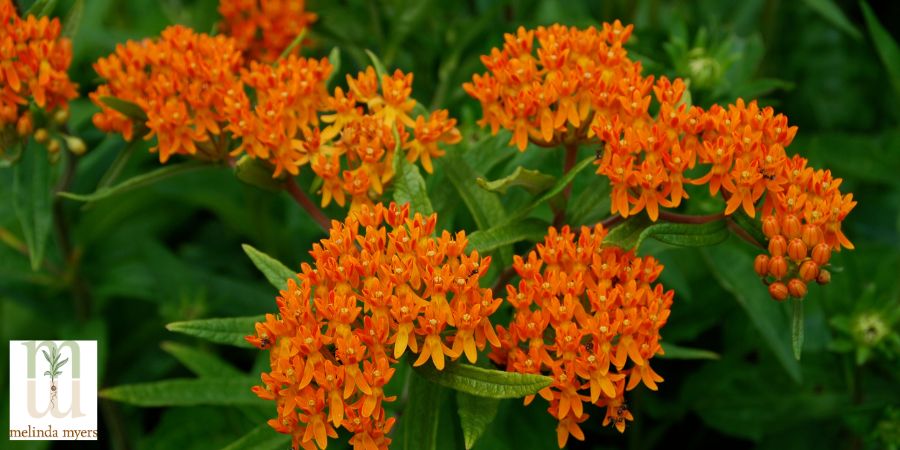
Butterfly Weed Asclepias tuberosa
Whorled Milkweed Asclepias verticillata extends the rain garden bloom time with its late summer into fall white flowers. The fine foliage on this 1 to 2’ tall plant adds nice texture to the garden. The seedpods and yellow fall color add to its late season beauty. Like other milkweeds it is a host for the monarch caterpillar and the flowers attract hummingbirds, butterflies, and other pollinators. Grow this zone 3 to 9 hardy milkweed in full to part sun and well-drained soil.
Great Blue Lobelia Lobelia siphilitica is a tall, 1 to 4’, mid-summer to fall bloomer. The spikes of blue flowers attract hummingbirds, butterflies, and other pollinators. I find this zone 3 to 9 lobelia much easier to grow than its relative, the red cardinal flower. It thrives in full to part sun with moist soil, where it can form easy-to-manage colonies.
White Turtle Head is a tall, 2 to 4’ plant suited to the wetter areas in the rain garden. It prefers full sun to part shade and flowers in late summer. Watch for bumblebees that pry open the flowers to reach the nectar inside. Hardy in zones 3 to 8, you can also find shorter cultivated varieties at some garden centers.
Calico aster Aster lateriflorus is sure to brighten those shadier spots with its delicate white flowers. The 2 to 3 feet tall plant is hardy in zones 4 to 9, prefers well-drained soil, and is a host plant for several butterflies and moths. This fall bloomer provides pollen for late-season pollinators and seeds for songbirds. Pinch it back early in the season for more compact growth.
Sedges Carex spp. You can find a variety of sedges suited to rain gardens. Many sedges prefer moist to wet soils, making them good choices for the wetter areas of your rain garden. Look for those listed as non-aggressive or clump-forming to minimize the need to manage their spread. Their fine grass-like foliage combines nicely with the flowering plants and provides a sense of unity when used throughout the garden.
Prairie Dropseed Sporobolus heterolepis is a native grass at home in just about any landscape style. The tufts of fine foliage grow 2 to 4’ tall, turn yellow in fall, and persist throughout the winter. Flowers appear in late summer and have a unique fragrance, like coriander. Grow this plant in the drier parts of rain gardens in zones 3 to 8.
Preparing the Rain Garden
Consider using landscape paint to mark the boundaries of your garden. When possible, enlist the help of friends and family to make creating the rain garden a more manageable task. Consider teaming up to help each other with this and other landscape projects.
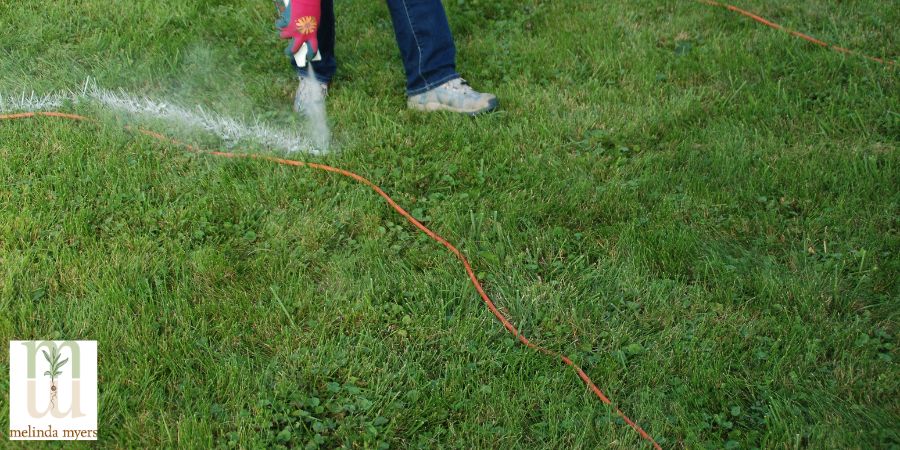
Marking the boundaries of the rain garden
Grab a shovel or join forces with fellow gardeners and rent a sod cutter. Remove the sod from the area and use it to patch bare spots in the lawn or add it, green side down, to the compost pile.
Once the sod is removed, dig out the garden to a depth of 5 to 8”. Have tarps or wheelbarrows on hand to help manage and haul away excess soil. Use this soil to adjust the grade around your house, fill in holes, or create a raised garden.
Start digging at the side closest to the house. Continually adjust the depth to achieve a level surface throughout the bottom of the garden. Use some of this excess soil to create a berm at the street side of the bed to help contain and slow any water that overflows the edge of the garden.
Mix 2” of compost into the top 6 to 12” of soil to improve drainage in heavy clay soils and increase the water holding ability in fast draining soils. This is important to ensure your rain garden is working properly. This is also a good time to incorporate low nitrogen slow release Milorganite fertilizer that promotes balanced above and below ground growth. It also contains 85% organic matter improving the soil as well as feeding the plants.
Direct your downspout to the rain garden using a downspout extension. Burying a flexible downspout extension makes mowing grass between the downspout and the garden easier. Just make sure the buried extension gradually slopes away from the downspout to the garden to prevent backups. Place stones at the end of the downspout extension to prevent the water from washing out and eroding the soil.
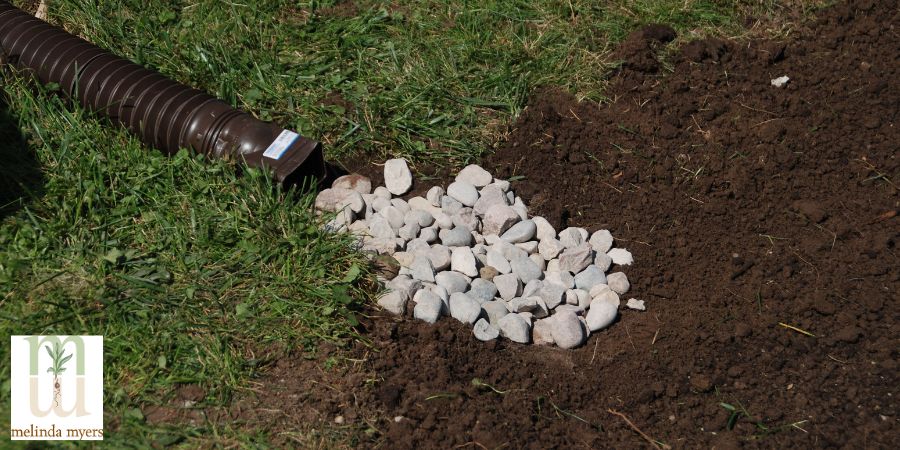
Stones at the end of the downspout extension
Planting the Rain Garden
Lay the plants out in the garden adjusting the placement as needed to maximize the visibility of each plant and overall beauty of the garden. Check tags and place drought-tolerant plants along the sides and edges and those that prefer and tolerate wetter soil in the center where the water is last to drain.
Carefully slide the plants out of the container and loosen any circling roots to encourage them to explore the surrounding soil. Set the plants in the soil at the same depth they were growing in the pots and make sure the roots are covered. Leave the tags in place to help you get to know the plants. Snap a picture of the individual plants and garden to help you differentiate the good plants from weeds in the future.
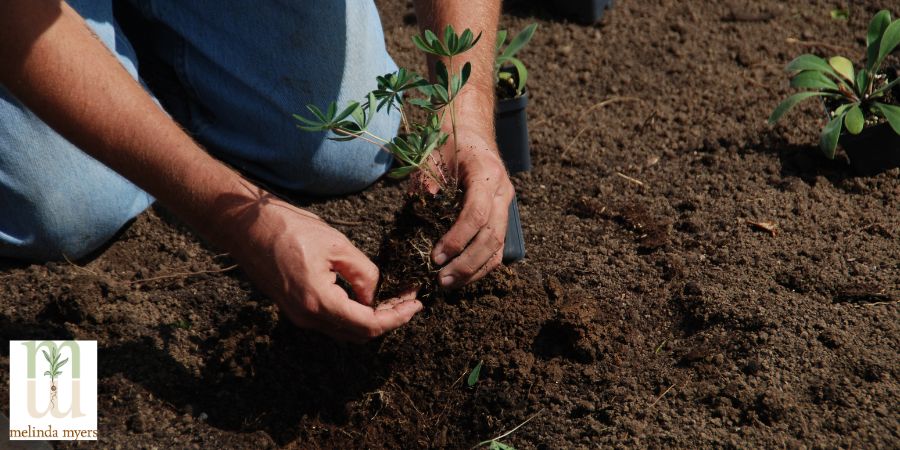
Planting a rain garden
Water new plantings thoroughly to help remove air pockets and moisten the soil around the roots. Check the soil moisture every few days and water thoroughly when the top few inches of soil are crumbly and slightly moist. Continue to water thoroughly but gradually extend the time between watering to encourage the plants to develop a robust root system. After a year or two you should only need to water your rain garden during extended dry periods.
Help conserve soil moisture and suppress weeds as well as improve and protect the soil with mulch. Apply several inches of an organic mulch to the soil surface pulling it away from the crown of the plants. Select a mulch that will stay in place in heavy rains and has Mulch and Soil Council Certification on the label or was obtained from a reliable source. Always ask how the mulch is obtained and managed to minimize the risk of insects, disease, and other contaminants.
Evaluate and Enjoy
Like any gardening project, adjustments may be needed. Monitor your rain garden throughout the growing season. If the garden is properly sized and soil prepared, rainwater should collect in the garden and gradually drain into the soil below. You will need to expand your rain garden if water remains standing for more than 24 hours. I know it is more work but look at it as a chance to add more plants.
Thanks for making a difference by creating a beautiful garden for pollinators, songbirds, and you to enjoy. By helping keep rainwater on your landscape, you help prevent basement backups and reduce water pollution and sewer overflows.