From Lawns to Lanais: My Journey with Potted Plants
- "The Lawn Care Nut"May 11, 2024
You all know me as a lawn guy, but did you also know I’m also a big “potted plants on the lanai” kind of guy too? Over the last couple of years, I’ve made it a point to step up my potted plant game, especially on my back porch, or what we call “the lanai” here in Florida.
My favorite type to collect and grow are plants known as “epiphytes.” Epiphytes are plants that grow on top of another plant without harming it. They get most if not all of the moisture they need from the air and rain.
The most famous epiphyte in the South is Spanish Moss, and you know it because it gives our oak trees that stately look. Some would even think of it as a haunting look!

Spanish moss is an air plant known as Tillandsia. It’s epiphytic in that is grows on other plants, mostly oak trees in my area.
I like Spanish moss, but it can stay in the oaks. It's a full-on “air plant” and is a little messy for my lanai or around the pool.
Growing Epiphytes in Containers
The epiphytes I like are the kind that you can grow in pots but don’t drop messy leaves or require a ton of water. The pot and soil aren’t necessarily even required, but if they are there, the plant will utilize them mostly for actual physical support but also for nutrients and water when available.
The epiphytes I’m talking about are known as bromeliads, and they are available for sale right now in every nursery from Florida over to Texas, out west in California, across the Midwest, and way out East, too. I think they are one of the coolest looking yet easiest to care for back porch plants you can get! Like I said, they are NOT messy (no shedding leaves) and they are super easy to care for: Just fill up their cups on top once per week with some reverse osmosis (ROS) water and they will do very well.
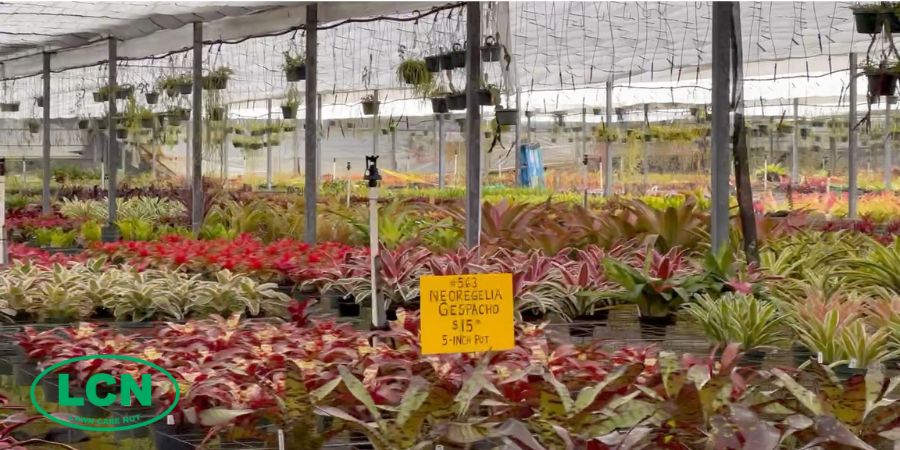
These are bromeliads available at my local grower called TropiFlora. The good news is bromeliads are also available at most nurseries across the entire US this time of year!
They do need to be in some sunlight during the day but not “straight on direct, full burn down from the high afternoon sun” either.
Mine are in full sun under the screened lanai from about 11 AM until 5 PM daily, and that is perfect for the ones I’ve got. The screened lanai does enough to filter the light just right for them, even under the hot Florida sun.
Now, you should still water them in the root zone at least once per month. I still fill up the cups weekly, and then on one of those waterings, I also soak the root zone with the same ROS water. I flush it through until it runs out the bottom.
That’s it!
I have a nursery I go to here locally that has some really cool colors of bromeliads. They even breed some of the more rare colors and it’s fun to see what they have in stock during the season. One thing I have learned is that when I get a new plant, I pick the spot I want it to go, and let it stay in the nursery pot for a minimum of 2 months just to see how it will do there. I drop the nursery pot inside the future transplant pot and let it stay for a while. This also lets me see if I like the pot with the plant in that spot too.
Once I’ve determined that this spot does have the right amount of sun exposure needed (keep in mind the angle of the sun changes through the season), then it’s time to go ahead and give the bromeliad it’s formal pot. By this time the plant’s got a name too.
This is Felix and he is a Neoregelia Hybrid called 'Guacamole'.
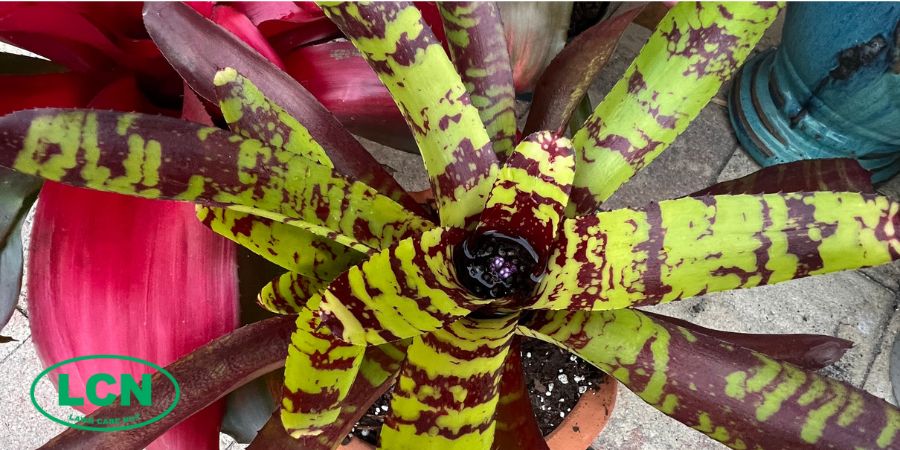
This bromeliad hybrid is called “guacamole.” In the center, you can see the cup that I keep full of water weekly.
I water my bromeliads weekly by filling their cups. I water the root systems one time per month.
Now when you read about bromeliads and the soil you put them in, you will see over and over the term “well drained.” This is not a suggestion. Bromeliads need to be in well-drained soil. We don’t want them to get wet feet. Remember, these are epiphytes and could live entirely on top of another plant with no soil at all. Here are some bromeliads growing on top of a majestic oak tree at the Selby Botanical Gardens here in Sarasota.
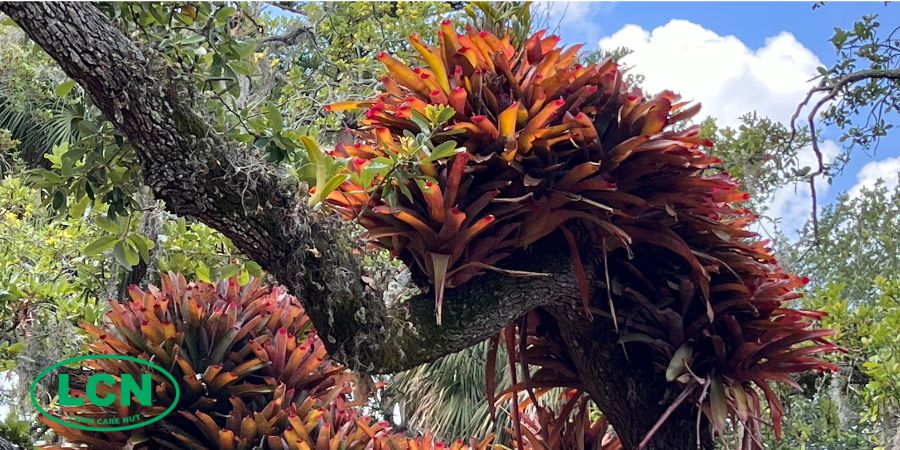
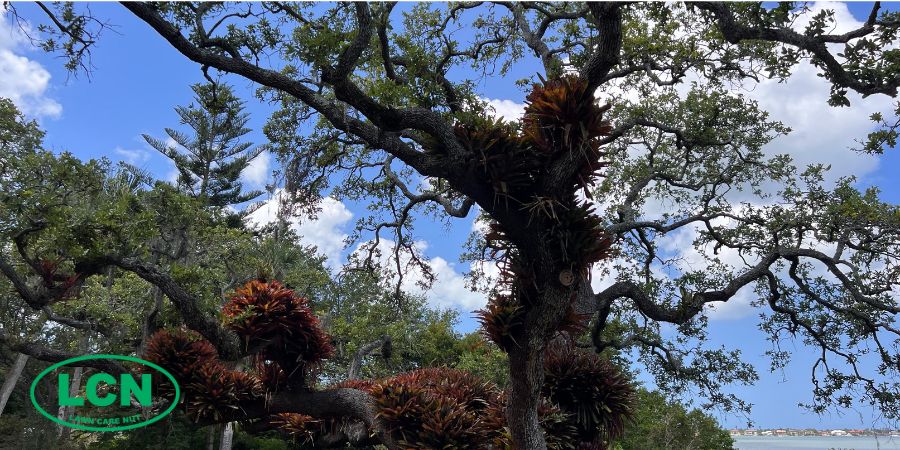
These bromeliads grow directly on top of the strong lateral branches of this live oak. No soil and no outside irrigation help. They just hang on tight and hope for the best!
The bromeliads you get at the store have been raised in soil, and we want to keep them that way. But I can’t stress enough how important it is to have soil that drains and has lots of airflow!
The mix I use is pretty simple.
I go to my local nursery and pick up:
- Potting Soil Without Fertilizer (50 qt bag, you won’t use it all - you could also use straight peat moss)
- Perlite (8 qt bag)
- Orchid Bark (8 qt bag - it’s mostly big wood chips)
- 2 Scoops of Soil From My Own Back Yard
- Milorganite (see chart)
I don’t make it complicated. I get a 5-gallon bucket and fill it ¾ full with the potting mix. I buy the cheapest stuff I can find, and usually, it’s mostly just peat moss. If it’s got wood chunks in it, that’s fine, too. From there, I add the entire bag of perlite.
Incorporate this completely.
| Container Size | Tablespoons of Milorganite |
|---|---|
| 5-Gallon | 10 (2/3 cup) |
| 2-Gallon | 4 |
| 1-Gallon | 2 |
| ½-Gallon | 1 |
| 6-Inch | ½ |
Next I add one full bag of orchid bark mix. The typical size I find is an 8qt and I add the entire bag and incorporate this into the mix. It’s mostly a lot of wood chips.
I also like to add in 2 small scoops of my native soil from my yard. My soil is mostly sandy but I don’t do this for the structure of the soil. I more do it for the microbial life that exists in my soil. Yours too. There are hundreds of thousands of microbes in every square inch of your native soil and I like to get some of these into my pots right at the beginning. It’s like my way of connecting this new plant with my land. That’s important to me!
Next, I add 10 tablespoons of Milorganite. I want the phosphorus for root growth and the slow release nitrogen is perfect for a slow feed up top. That’s why I don’t buy potting mix that contains fertilizer already. I like to add my own, and Milo is always my first choice.
Have fun shoving your entire arm down in the bucket and mixing this all up. It’s fun!
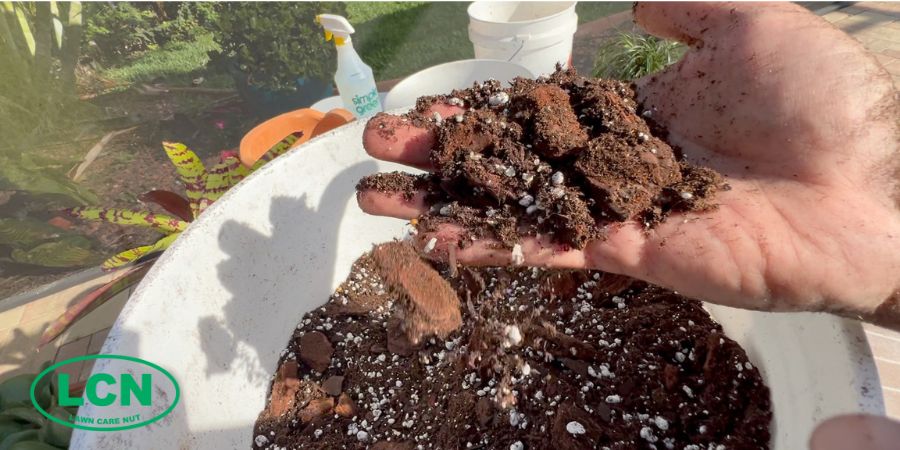
I like these larger chunks in the finished mix. I picture the bromeliads rooting around them like they would on the branch of a tree.
However, I do recommend you wear a mask. You don’t want to breathe in the perlite. I did and it gave me a sore throat for a day. Perlite is expanded volcanic glass and when you breathe in the dust it can get you like it got me! Don’t be scared, just mask up and enjoy digging in the dirt!
Once I get them potted, I give them a good soaking at the roots and then fill up the cups. Recently I’ve also been giving them an initial dose of root growth stimulant (sea kelp) and some Hydretain moisture manager. I add this to all of my potted plants a couple of times per year, and when I’m re-potting, I’ll use it on the new transplants as well. This helps the roots spread into the new soil a little more quickly, and the Hydretain helps retain moisture around the roots in the midst of this very loose soil.
This 5-gallon bucket full of mix makes enough for me to re-pot several plants, depending on the pot sizes, so I usually save up and transplant several at the same time.
On my last transplant session, I rehomed some hoyas and succulents with my leftovers.
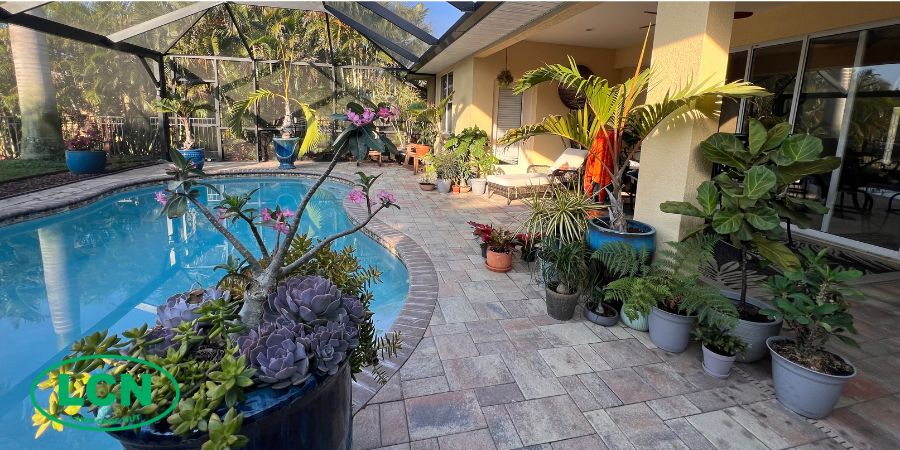
Here is my lanai at 8:30 AM, already starting to see direct sunlight on the far side. This will be full sun by 11 AM and remain that way until late afternoon.
Hoyas are epiphytes too. The philodendron is probably the most well-known, along with the caladium and the golden pothos that hang in everyone’s kitchen or office window.
I’ve got all of these on my lanai in the same soil.
Growing Succulents in Containers
This mix also works VERY well for succulents which are very popular for porches and inside houses too. Think of cactus, jade plant, snake plant and aloe vera - these are all succulents and they like the same well-drained soil. I bet you’ll find a good variety of these at your local nursery too!
A snake plant will do well in the same well-drained soil.
I encourage you to get out this weekend and have a little fun outside of the lawn!
I know this blog is much different than what you usually get from me, but I figured it would be fun to share some of the other green stuff that I do. One thing’s for sure: I’ve learned a lot about growing lawns over the years that directly translates into potted plants and I’m enjoying the flexibility and creativity it affords over and above!
I’ll see you on the lanai!

