How to Plant and Protect Spring Flowering Bulbs
- Gardening Expert and Host of Growing a Greener World®September 28, 2024
One of my favorite fall gardening tasks is planting bulbs. It’s such a satisfying one-time investment that rewards you with beautiful flowers season after season. In this guide, I’m going to walk you through the essentials of planting and protecting your bulbs to ensure they thrive and bring you joy next spring and beyond.

Choosing the Right Spot
When you’re selecting the location for your bulbs, aim for areas that get at least six hours of sunlight a day. Bulbs like daffodils and tulips love the sun and will put on a spectacular show in the spring if they’re planted in bright spots. But don’t be afraid to plant early-season bloomers like crocuses, snowdrops, and some daffodil varieties under deciduous trees. The reason these work so well is that they flower before the trees fully leaf out, giving them plenty of sunlight when they need it most.
Preparing the Soil
Bulbs thrive in loose, fertile, well-drained soil. They’re not fans of compacted or waterlogged soil, so if you’ve got heavy clay, you’ll want to amend it with organic matter, like compost, to improve drainage. A healthy soil foundation is key to long-lasting blooms.
How to Plant Bulbs
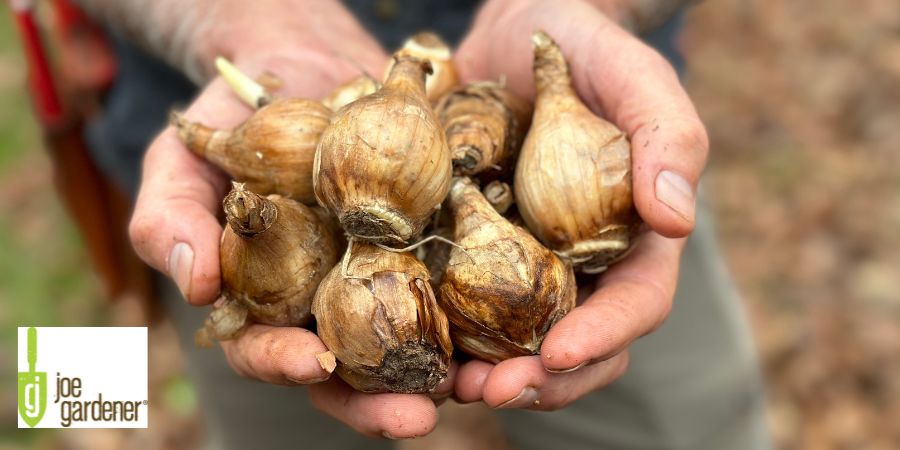
The planting depth for bulbs is typically about three times the height of the bulb. So, if you’ve got a bulb that’s two inches tall, aim to plant it six inches deep. For larger bulbs like tulips and daffodils, space them about 4 to 6 inches apart. Smaller bulbs, like crocuses and snowdrops, only need about 1 to 2 inches between them.
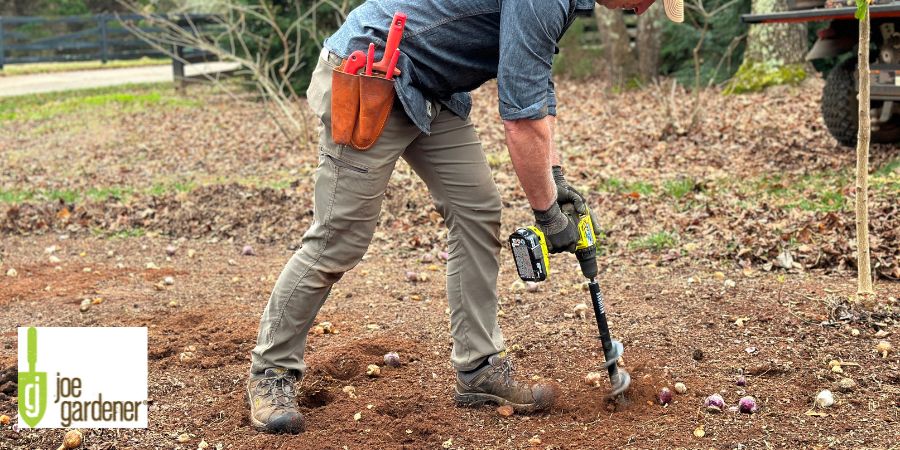
If you’re anything like me, you probably enjoy using tools to make the job easier. I personally love using a drill with an auger attachment for bulb planting—it turns the task into something fun and quick. Whatever tool you choose, just make sure your holes are deep enough for the bulbs to thrive.
Should You Fertilize?
If you’ve been working to improve your soil over time with compost, that might be all your bulbs need. But if you’d like to give them an extra boost, bone meal is a commonly suggested option due to its high level of phosphorus (3-15-0).
Phosphorus (the middle number in the nutrient ratio) helps bulbs establish and develop strong roots. While bone meal will certainly provide a phosphorus boost, it may be more than necessary. Phosphorus is usually already at levels in the soil sufficient for what is needed. Adding much more can be excessive.
Alternatively, an option that offers a lower level of phosphorus with the added benefit of slow-release nitrogen is Milorganite. It has a nutrient ratio of 6-4-0. In most cases, this is a sufficient amount of phosphorus for an extra boost without being excessive. And because of its slow-release formulation, the included nitrogen will provide more benefits later when foliage development is key.
Protecting Your Bulbs from Critters
Here’s where things can get tricky. Squirrels and other critters love to dig up newly planted bulbs. I’ve learned the hard way that you can’t just plant and forget about it. A simple trick I use is to place a layer of hardware cloth over the planted area. The one-inch square mesh is small enough to keep squirrels out, but it’s not so tight that it prevents the emerging foliage from pushing through in the spring. I leave it in place for about three months or until I see the new growth peeking out at the latest.
If you’re worried about the cloth moving, feel free to anchor it down with stones or bricks, but in my experience, it usually stays put.
Mulching for Protection and Warmth
After you’ve planted and protected your bulbs, go ahead and spread about two inches of mulch over the area. This does a couple of important things: it helps maintain soil moisture and keeps the ground a bit warmer during the winter months, which gives your bulbs a quicker start underground.
Protection from Wildlife
If you’re not already sold on the ease and beauty of spring-flowering bulbs, here’s another perk: many of the most popular bulbs are naturally resistant to deer and other destructive wildlife. I’ve even watched a herd of deer wander through my bulb lawn, grazing on the grass while completely ignoring the blooming bulbs. Now that’s what I call deer-resistant!
However, not all bulbs are safe from hungry critters. Tulips, lilies, and irises are among the favorites on the menu for deer and other wildlife, so you may need to take extra precautions with those varieties.
Watering and Spring Care
Once everything is in place, water the newly planted bulbs well. This helps settle the soil and gets the bulbs off to a good start.
Come spring, after you’ve enjoyed the colorful display, resist the temptation to cut back the foliage once the flowers fade. That foliage is busy collecting energy to feed the bulb for next year’s blooms. It may look a bit scraggly for a while, but let it do its thing—your bulbs will thank you next year with even more flowers.
With a little preparation and protection, planting bulbs in the fall is one of the easiest ways to bring life and color to your garden next spring. So grab your bulbs, get them in the ground, and enjoy the beauty they’ll bring to your landscape year after year.