How to Lay Sod
- Milorganite AgronomistOctober 12, 2024
How to lay sod isn’t a complicated process, but it’s a do-it-yourself (DIY) undertaking that requires careful planning and scheduling, as well as significant time, labor and budget. Sod can be used to repair small portions of lawn or replace an entire lawn. Either way, the process is the same.
Although seeding is less expensive than sodding, it does develop a deeper root system and offers more grass varieties or a mix of varieties. Seeding also requires multiple daily waterings, possibly for several weeks. Sodding has the advantage of being immediately usable. So, if instant use and gratification are your goals, sodding is definitely your best choice, but be prepared for the investment required for sodding your lawn.
Here are my step-by-step tips for laying sod:
Pros and Cons of Laying Sod
There are pros and cons to every DIY method of installing a new lawn, whether it’s by seed, sprig, plug, or sod. Here are some of the advantages and disadvantages to sodding whether you do it yourself or hire someone to do it for you.

Advantages of Sod
- Instant gratification
- Can be laid any time during the growing season
- Quality sod should be relatively weed-free
- Sod establishes quickly; Root begins to establish in 7 to 14 days
- Quickly controls soil erosion
- Significantly reduces water pooling and mud immediately after sodding
- Able to use sodded lawns immediately
Disadvantages of Sod
- Sodding is the most expensive method of establishing a lawn
- Fewer choices of grass species and varieties
- Labor intensive
- Drought and community watering restrictions may impact your schedule
Fall is the Optimal Time to Sod Your Lawn
The best time of year to lay sod is when the grass is actively growing and the weather is cooler—early to mid-fall. You can sod small areas or your entire lawn until the ground freezes. The temperature is cooler, so the sod won’t dry out as quickly as in warmer weather. The second-best time to sod is spring.
For cool-season grasses, ensure the lawn is established before winter dormancy; otherwise, you risk losing the entire lawn. The best time to sod also depends on the grass variety chosen. Ask the sod producer for specific recommendations or contact your county’s Extension office.
Sodding Equipment, Supplies, and Budget
It’s critical that you assemble everything you need before beginning your sod-laying project. Following is a list of materials and equipment you’ll need.
- Sod
- Soil amendment (i.e. compost)
- Milorganite fertilizer, 64 lb. or (2) 32 lb. bags per 2,500 sq ft) *In VA apply 32 lb. per 2,500 sq ft and the new lawn rates are not applicable in FL.
- Sod cutter (for smaller areas)
- Tape measure
- Sharp knife
- Shovel
- Tine rake
- Broom
- Lawn roller (rental)
- Garden hose/sprinkler head, unless you have an irrigation system
Selecting the Best Grass Variety for Your Conditions
There are many considerations when selecting the grass variety that’s going to work in your yard. Is your yard sunny, shady, or a little both? Do you have areas that are generally wet or dry? Do you have sandy, clay or fertile soil? How do you use your yard? Will the lawn primarily be decorative, or do you need a variety that can stand up to high traffic and activity from kids and dogs? The most important consideration when selecting grass varieties is climate. There are Northern, cool-season grasses and Southern, warm-season grasses.
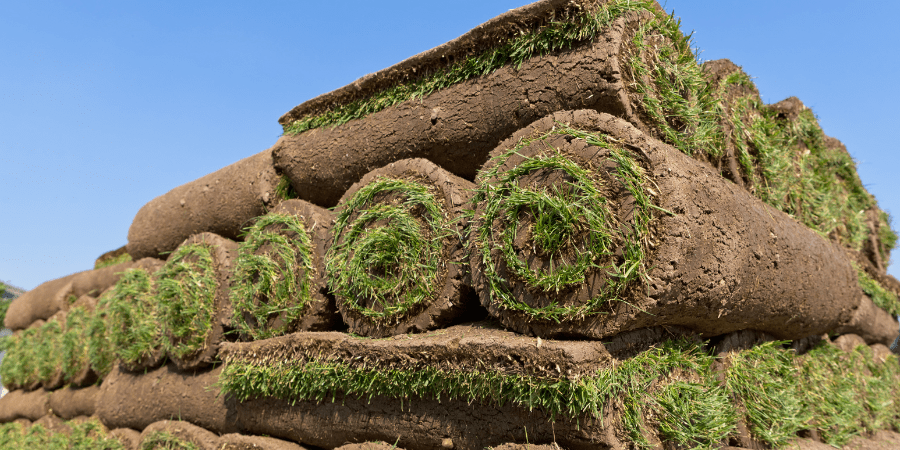
Sodding is simply transplanting mature grass from a sod producer’s field to your home. Sod may be sold in rolls or squares. Ensure you’re comparing equal-sized rolls and squares when shopping around. The best way is to calculate the square footage of the rolls and squares for an accurate comparison.
Purchase sod from a reputable producer and look for healthy, green grass with minimal thatch and free of both weeds and pests. It’s best to purchase sod that was grown in your area under similar conditions as your yard.
Timing Sod Delivery, Keeping it Alive
Timing is critical. Ideally, the sod should be cut by the producer the same day you accept delivery. Sod delivery should be scheduled for the day you’re completely ready to lay the sod.
Sod is perishable. Keep sod as cool as possible. Place pallets in a shady area to avoid exposure to direct sunlight and prevent the sod from drying out. It shouldn’t sit longer than 24 hours or overnight.
Removing the Existing Lawn
There are a few environmentally friendly ways to remove an existing lawn in preparation for laying sod. For small areas needing repair, the existing grass can be removed by hand using a shovel to dig it up. For larger areas, you can use a sod cutter to remove the lawn. Another option is to smother the lawn to kill the grass, which allows it to compost in place and adds valuable organic matter to the soil, but it takes about 8 weeks. Solarization is another natural method of grass removal that uses the heat of the sun to kill grass and weeds, in addition to some pathogens and pests. This method works best in the summer when the weather is sunny and hot and is excellent for the health of the soil, especially if you’re going to grow a new lawn. If you’re sodding a very large area, you may consider hiring someone to remove the lawn using a skid steer. Even do-it-yourself projects sometimes need outside help.
Preparing the Soil for Sod and Adding Milorganite
You’ve invested in quality sod. Protect your investment by properly preparing the soil.Soil preparation now will contribute to the long-term success of your lawn and reduce potential problems in the future. Laying sod on poor-quality soil will give you poor results, no matter how healthy the sod may be.
First, prep your soil by incorporating several inches of organic matter, such as compost, into the top 6-8 inches of soil. Milorganite should be mixed into the top 2-4 inches of soil before laying sod to help establish and feed the roots.
The amount of Milorganite to apply will vary depending on whether you have sandy or native soil. Use the higher Milorganite sodding rates for grass types that prefer higher nitrogen (Kentucky bluegrass or Bermuda grass) and in soils with low organic matter that have very infertile root zones.
| Soil Type | Seeding & Sodding | Sprigging & Plugging |
|---|---|---|
| Sand | 50-100 lbs* | 50-100 lbs* |
| Native soil | 25-50 lbs* | 25-50 lbs* |
*New lawns in VA apply 32 lb. per 2,500 sq ft. FL apply two times per year at the rate of 32 lbs. per 5,200 sq ft (per state regulations). Check with local ordinances for fertilizer blackout dates.
Milorganite is a slow-release, organic-nitrogen fertilizer that won’t burn the grassroots. The nitrogen and phosphorus support plant growth, and the iron in Milorganite keeps your lawn green without staining walks and drives. It also adds organic matter.
This is the time to level the yard and make sure your lawn will slope away from your house. The added soil and organic matter will improve drainage in heavy soils and increase water retention in sandy soils.
Break up clods of soil , where grass roots grow, by hand, turning the soil or using a rototiller. Add enough soil so that it settles to about an inch below sidewalks and driveways.
Laying Sod is Like Laying Bricks
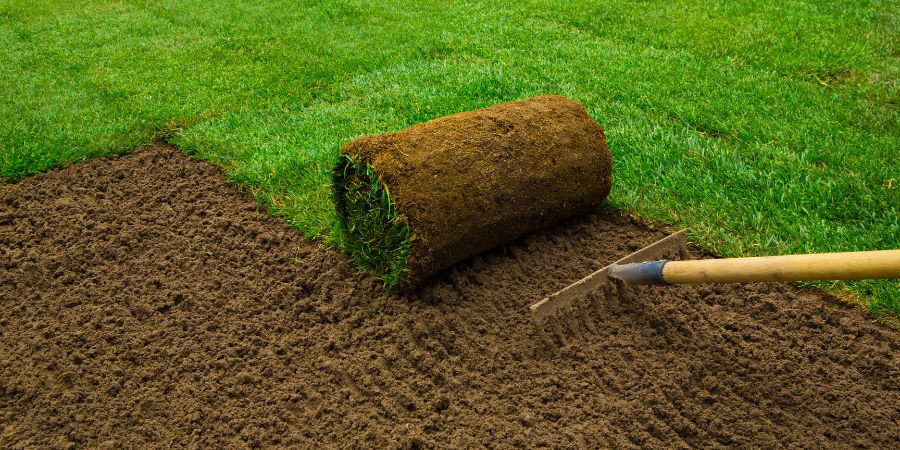
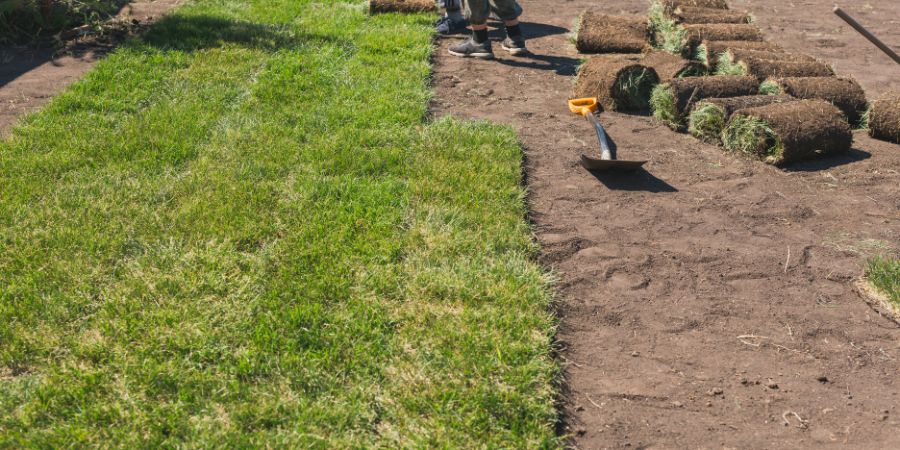
Whether using rolls or squares, begin by laying a piece of sod perpendicular to a drive, sidewalk or curb. Below or above that lay a piece of sod that’s been cut in half to begin staggering. Then continue to lay a full piece, then a half piece, and so on. Working out from the staggered full- and half-sized sod pieces, you can now lay full pieces of sod. Ensure the edges of the sod touch and the roots are in contact with the soil. Continue until the area is filled. Cut sod as needed to fit irregular areas.

Next, use an empty roller or gently tamp the sod in place to ensure good root-to-soil contact. You want to use an empty roller to reduce the risk of damaging the sod with too much weight, and the sod is also going to settle some on its own,
Consistent Moisture Needed to Establish Sod
Water your newly sodded lawn thoroughly and often to keep the soil moist until the grass has taken root. After the sod is laid, water thoroughly to penetrate the sod and soil to a depth of 2 inches. Your goal for the next couple of weeks is to keep the soil moist, but not soggy. Check local ordinances with regard to watering new lawns.

Starting on day two and until it’s established, keep the sod and soil moist throughout the day. You don’t want the sod to dry out. Depending on weather conditions, you may need to water 4 to 6 times each day for approximately 5 to 6 minutes at a time. The short roots can’t take up large amounts of water at a time. Maintain this watering schedule until the roots are established, usually within a week or two.
You can test to see if the roots are established by gently lifting a corner of a piece of sod. If it comes up easily, the roots aren’t established. If there’s some resistance, it indicates that the roots have started to establish.
Once the roots are established, you can gradually reduce watering. If you’ve been watering 4 times daily, reduce it to 3 for a couple of days, then down to two times until you’re down to watering once a day.
Now you’ll want to water more deeply and less frequently, which is what mature lawns need to thrive. Less frequent, deep watering encourages deeper root growth. Once fully established, your lawn will need approximately 1 inch of water per week (7-day period), whether it’s from rain or irrigation.
Fertilize New Sod with Milorganite After the 3rd Mowing
It’s time for more Milorganite. After the 3rd mowing of your new lawn, apply 64 lbs. or two 32lb bags of Milorganite per 2,500 sq ft area, this time on top of your newly laid sod. Milorganite provides nutrients at a rate grass can use and won’t burn the newly laid investment. Milorganite’s slow-release nitrogen promotes steady blade growth, while the non-leaching phosphorus promotes root growth.
If you laid cool-season sod in mid to late fall, skip your late-fall dormant Milorganite application. After your lawn is established, follow a seasonal fertilization schedule for your grass variety and climate.

